

In this article, I will explain how to simply create an Advent calendar for your partner, family, or friends using the WordPress.com service.
The realization of this one is totally free and you don’t need any knowledge in computer science or web development.
1. Introduction
Like many people, my girlfriend and I are still separated because of COVID. She is Thai and I am French. 🇹🇭🇫🇷
Being more than 20,000 km away from each other and not being able to be together because of the restrictions of our countries, I still wanted to be able to offer her happiness and love during this holiday season. So I designed and developed an Advent calendar using web languages and the Vue.js framework.
I then posted a text and screenshots of my work in the Love Is Not Tourism group on Facebook. I was pleasantly surprised by the number of likes and comments.
Some people in the group were interested in the project and wanted to be able to do one of their own. But not everyone is a developer, that’s why I looked for a simple way to be able to do it.
2. Presentation of WordPress.com and explanation of the project
First of all, you should know that there are two types of WordPress services:
WordPress.org that downloads and installs on a server, with this solution you have access to everything, everything is possible. But it can be difficult to install and set up if you don’t know a little bit about the web world.
WordPress.com (which we will be using) is a self-hosted service, meaning you don’t need to worry about buying hosting since everything is already managed by the publisher. This service has several offers, one of which is free. The free offer limits the addition of extensions and the installation of external themes (themes that you could have developed using WordPress.org for example).
WordPress allows you to create websites or blogs. So we’re going to create a kind of small blog, but we’re going to limit access to only authorized people and we’re going to schedule our articles to be visible only on the desired day (just like the boxes in an Advent calendar).
3. Create your account
Start by going to wordpress.com and click on the “Create your website” button, fill in your email address, choose a username and choose a password and then click on “Continue”.
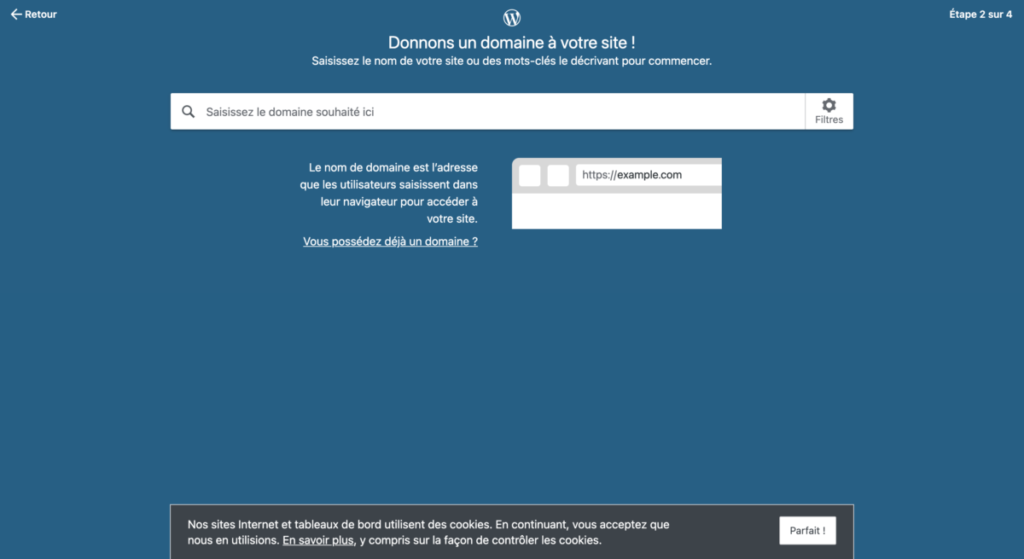
On the next page, you must choose the domain of your site. Choose well because it is the one you will find after https:// (for example benjaminsimier.com is my domain name).
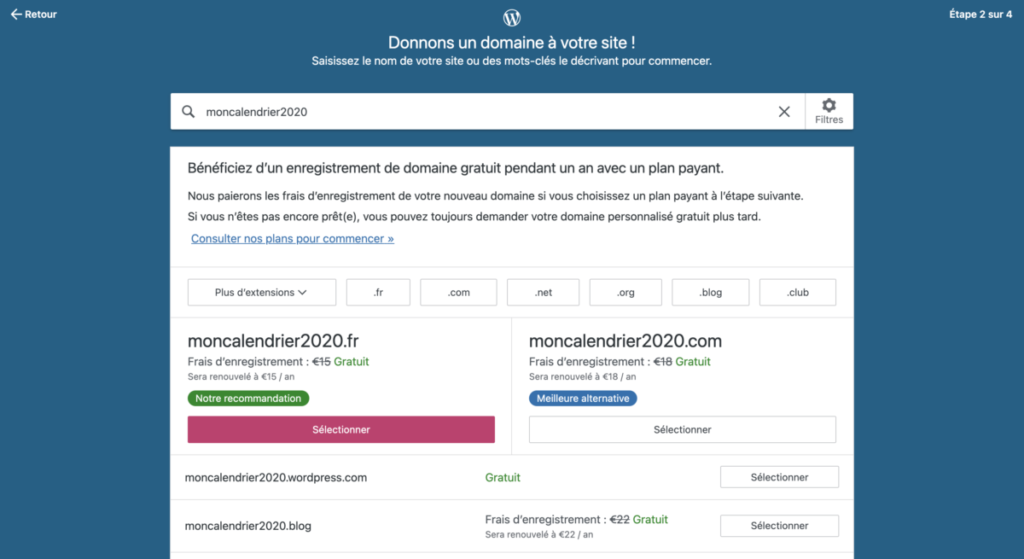
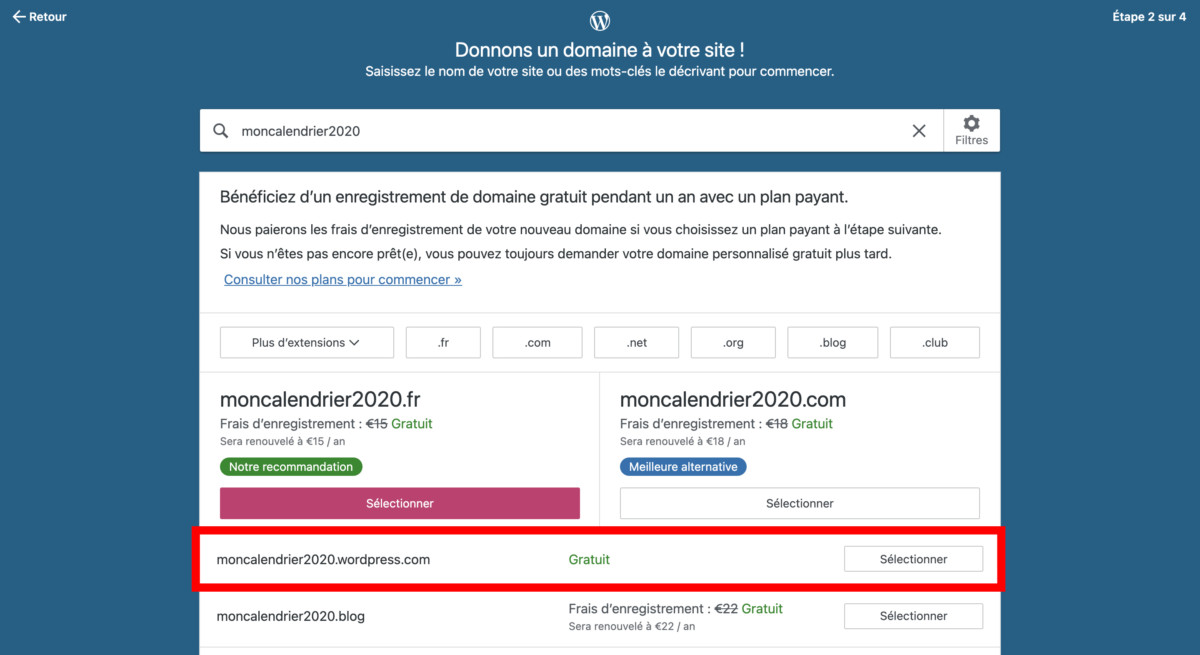
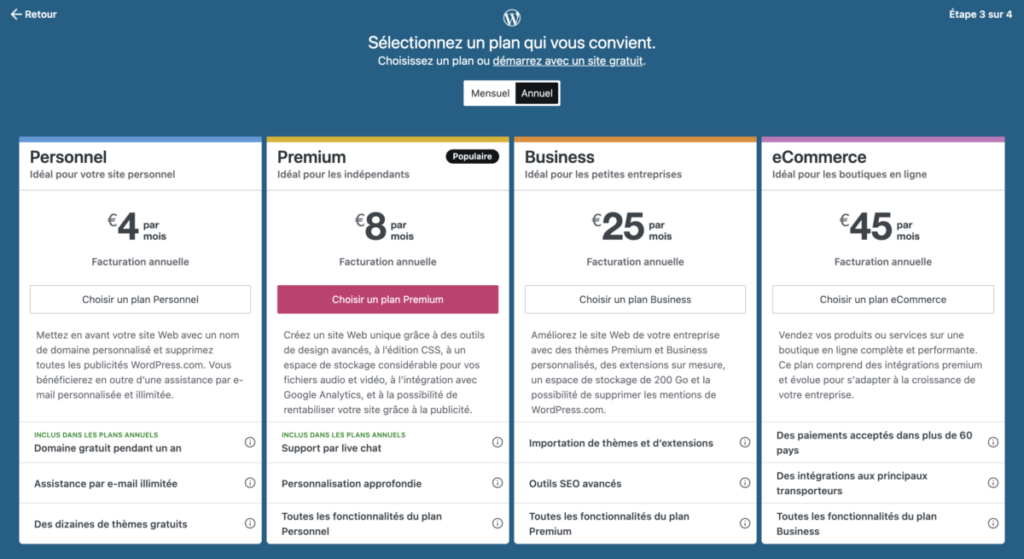
Write your domain name and look a little lower, the free offer is proposed to you. If I choose the domain name “moncalendrier2020” and I want to use the free offer, I select “moncalendrier2020.wordpress.com”. If the domain name is already being used by someone else, WordPress will offer you another available domain name, for example “mycalendar202043245.wordpress.com”. Please note that WordPress.com offers you other domain names without “wordpress.com”, these are paying domains (.com .blog .fr, …).
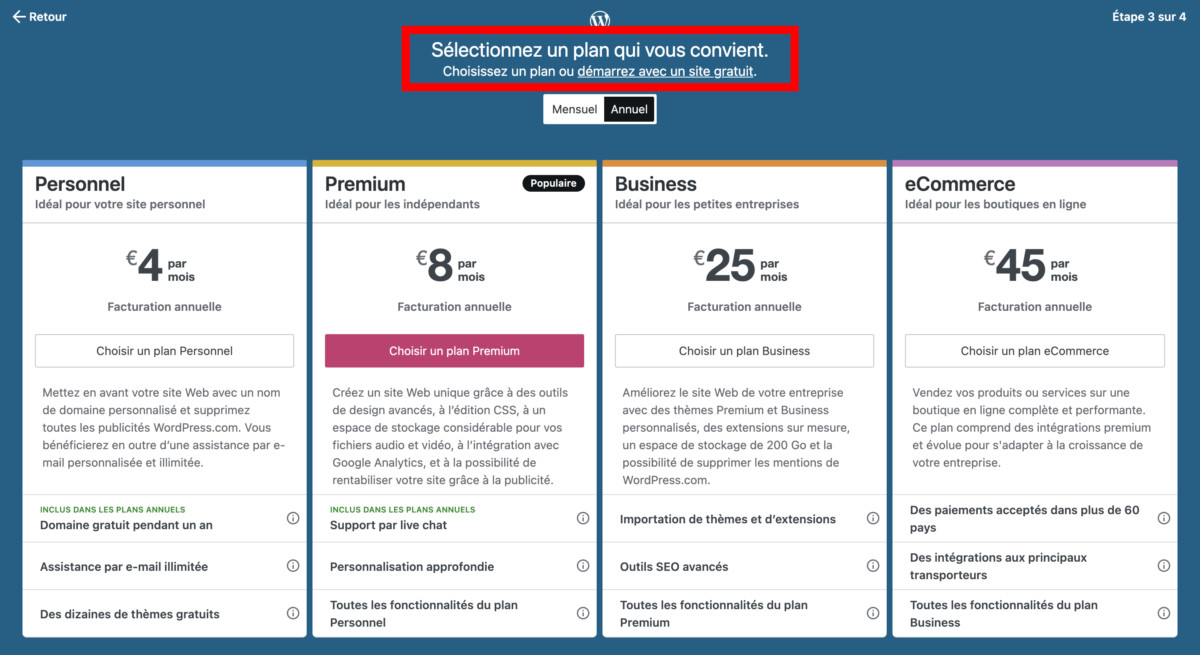
Once you have selected the domain, you will arrive at step 3 of 4. Here, click on “start with a free site” at the very top of the page.
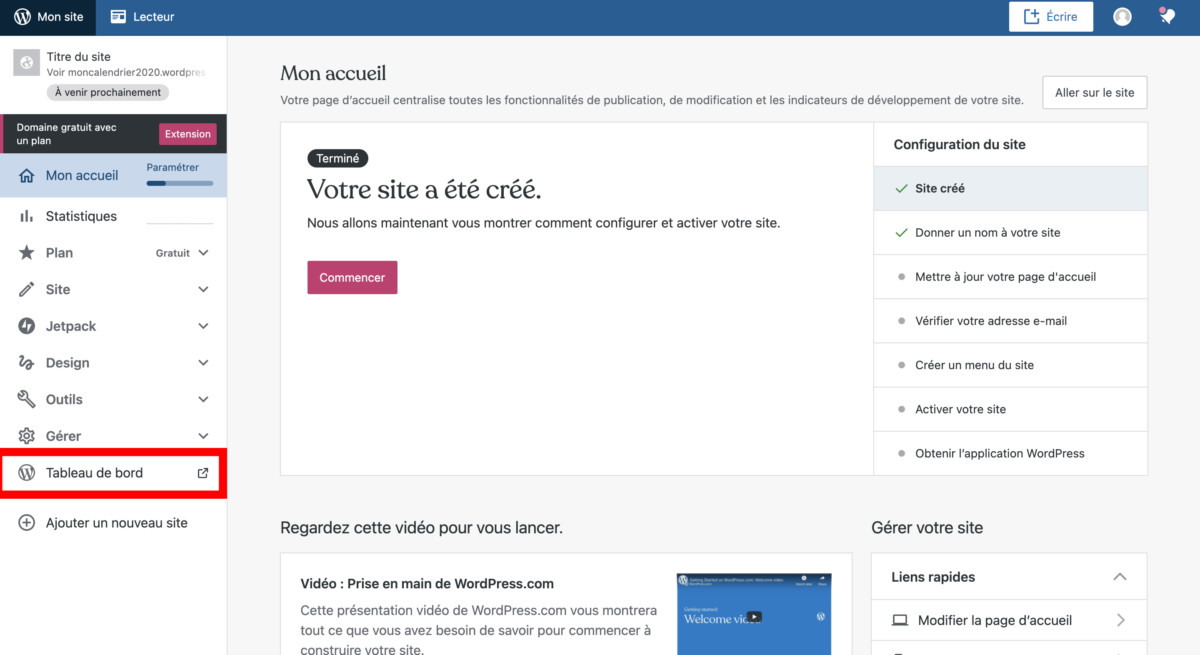
You are now on the settings interface of your account, we’ll talk about it later when we see the access restriction in part 5 of the tutorial.
Click on “Dashboard” at the bottom left to continue this tutorial.

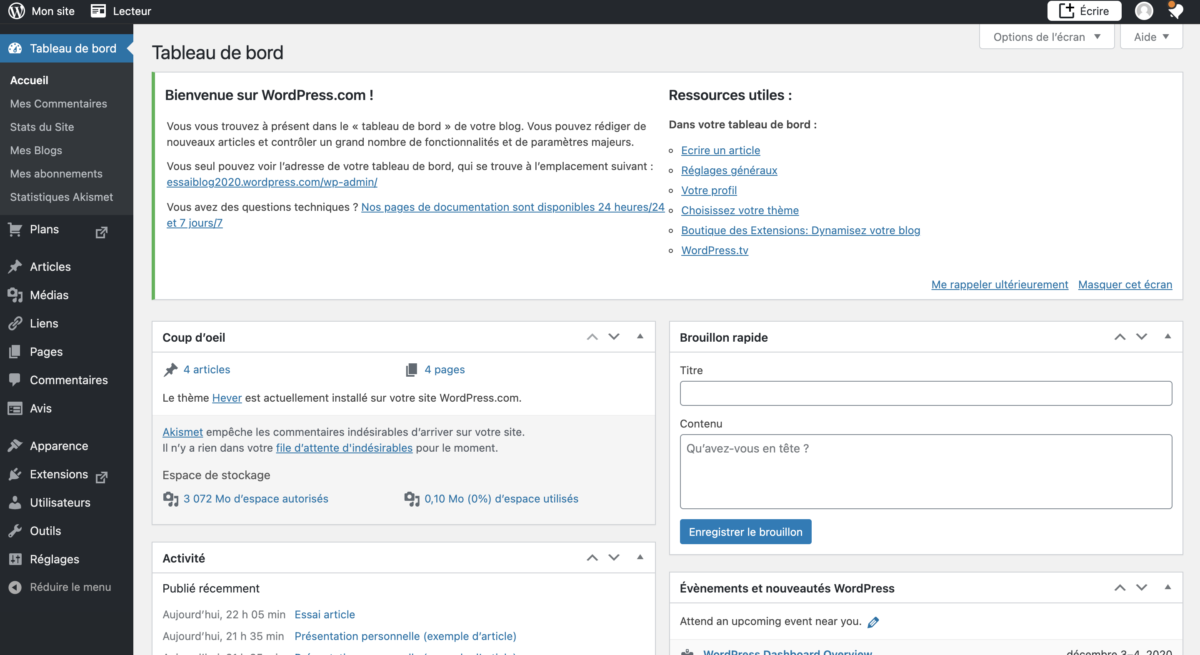
4. Presentation of the interface
The WordPress interface is very simple and intuitive, it is divided into two parts, on one side (left) the menu, and on the other side the information display.
The dashboard provides quick access to all information at a glance 👀
The parts that will interest us for the rest of our project are “Articles”, and “Appearance” (in the left menu).
5. Restricting access
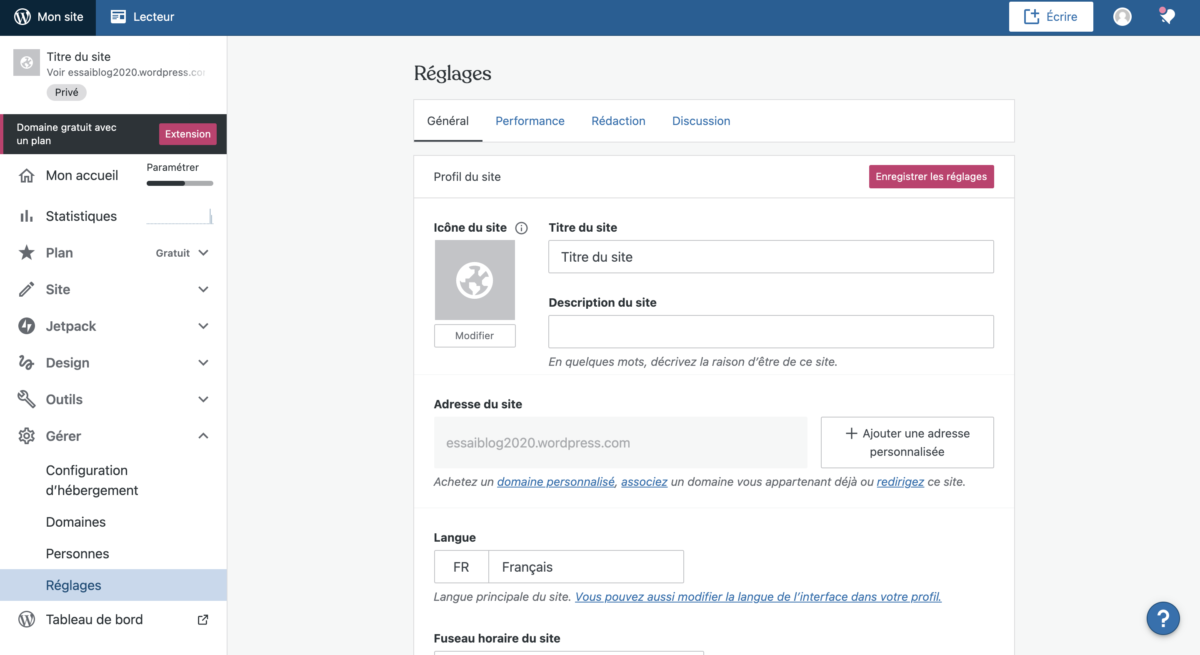
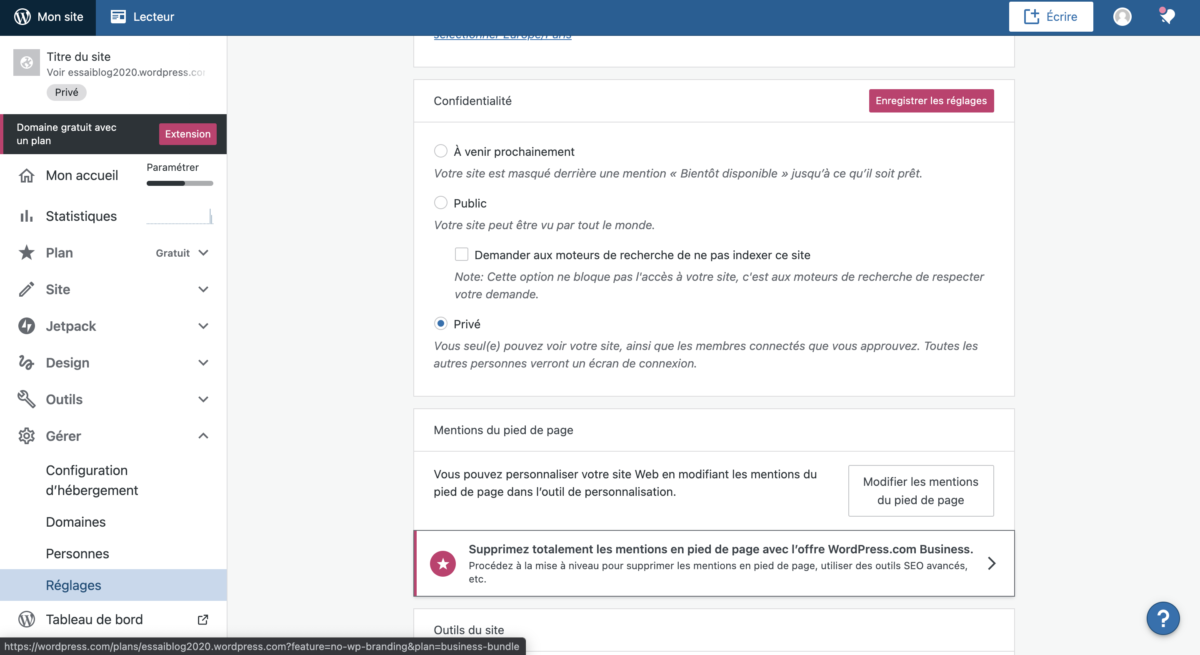
In order to limit the access to your calendar to authorized persons only, we will modify some parameters. To do so, let’s go back to the previous page (or click on “My site” at the very top left). In the menu on the left, click on “Manage”, then on “Settings”. Look for the “Confidentiality” block (validate your email address if you have not done so in order to access it). Check “Private” then save the settings (button at the top of the block). Your blog is then blocked and a password will be asked to display the pages and articles.
This step can be done once step 7 is completed, as it will send an email to the person (so they will know the existence of the blog/calendar :
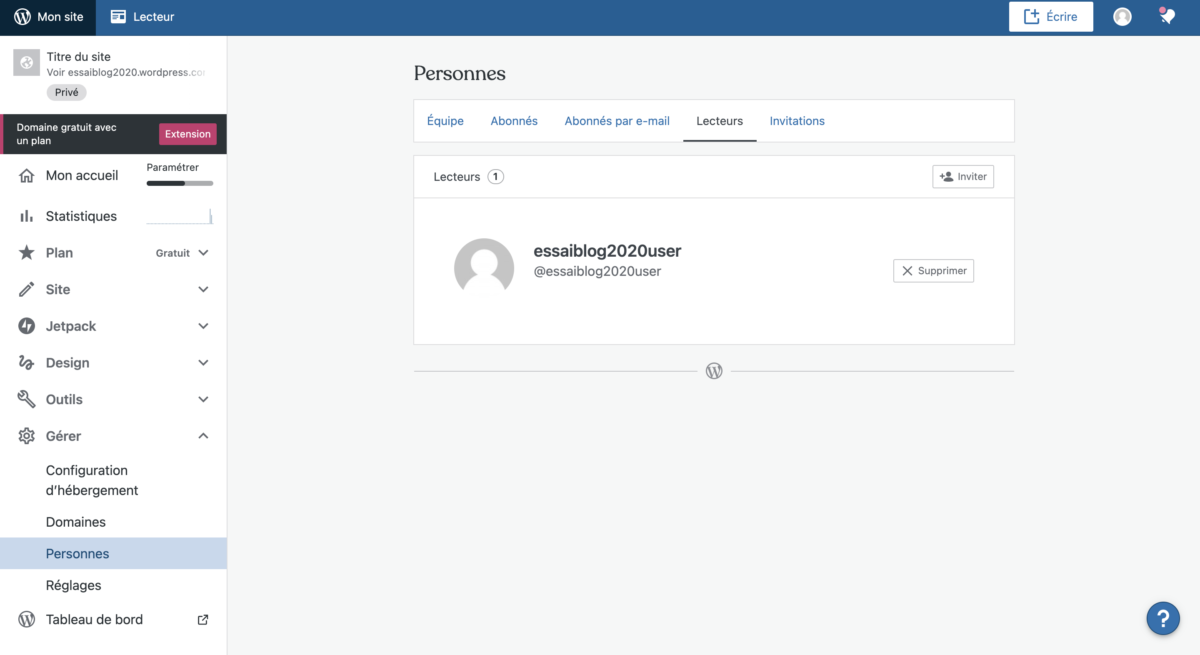
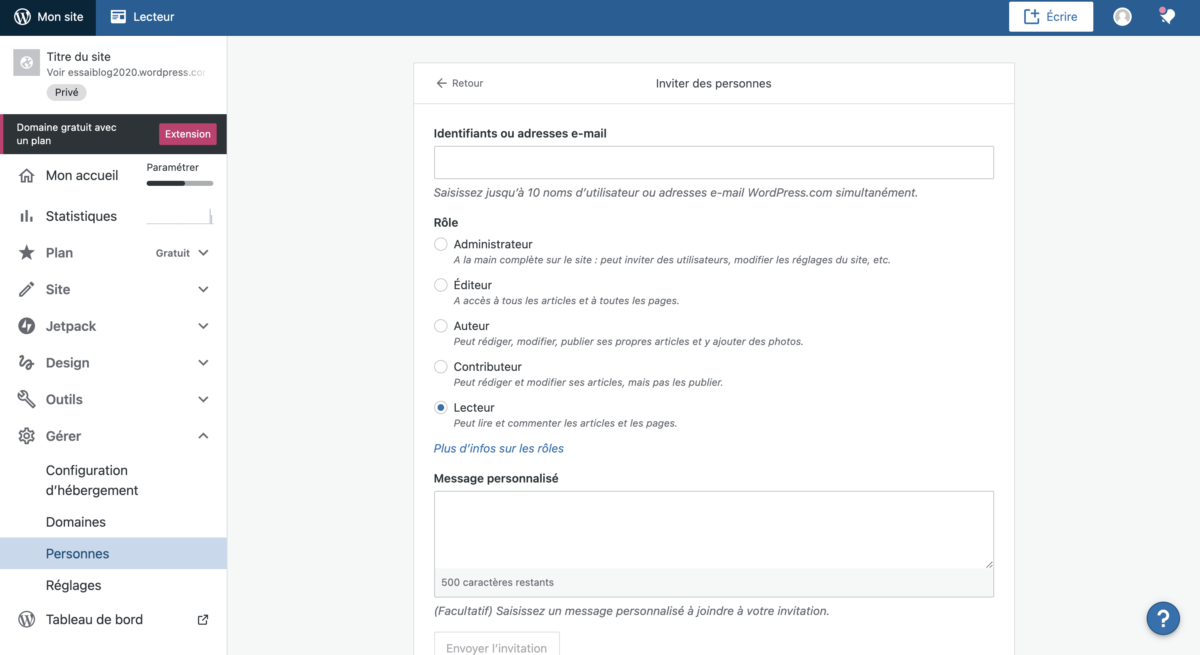
On the left side (in the menu), go back to “Manage”, then “People”. At the very top of the block, click on the “Reader” tab and then on the “Invite” button. Fill in the e-mail of the person you want to invite, check that “Reader” is checked, add a message if you wish, and click on the “Send Invitation” button.
6. Publication and planning
We will now write our articles and plan their publication.
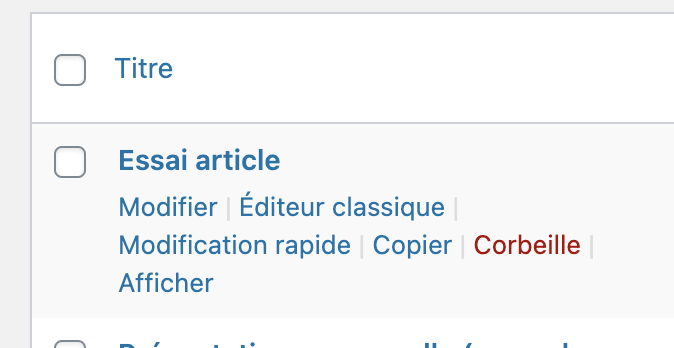
Go to your WordPress administration, click on “Articles” in the left menu. Delete existing articles by clicking on “Trash” when you hover your cursor over the titles.
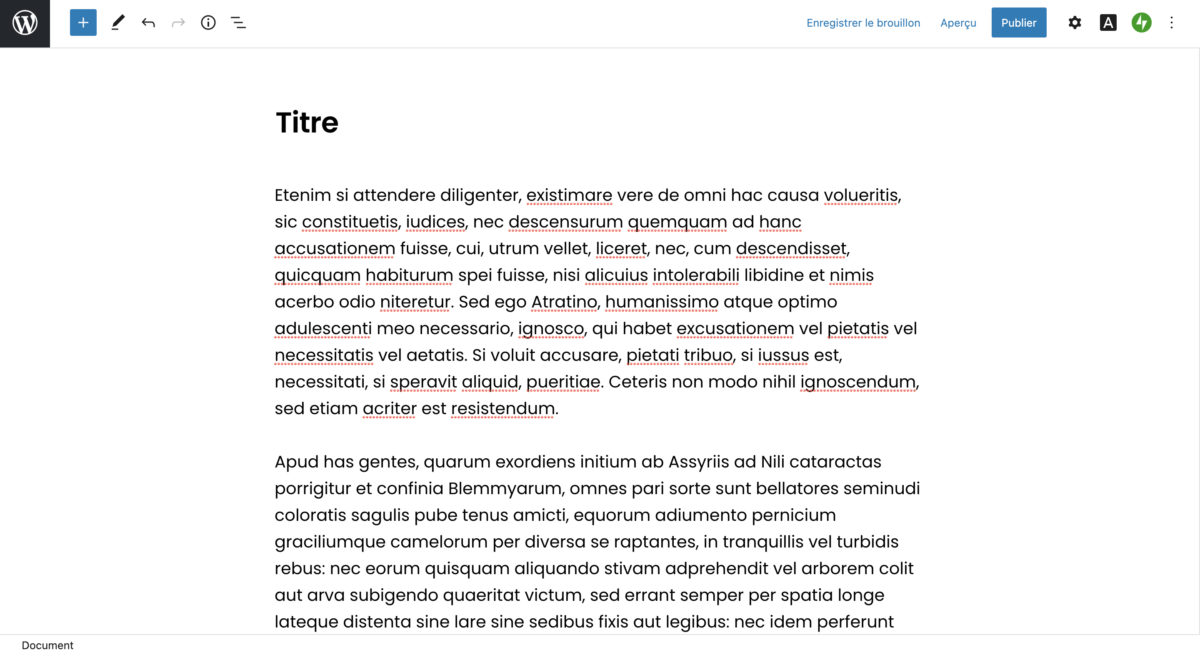
Click on the “Add” button at the very top of the page. You arrive on the editor (if you want to go back, click on the WordPress logo at the top left). Add a title, write it down. Feel free to click the little “+” next to the WordPress logo at the top left to add images, galleries, titles, …
You can preview your article by clicking on the “Preview” button in the top right corner, select the desired device (mobile or computer), then click on “Preview in a new tab”.
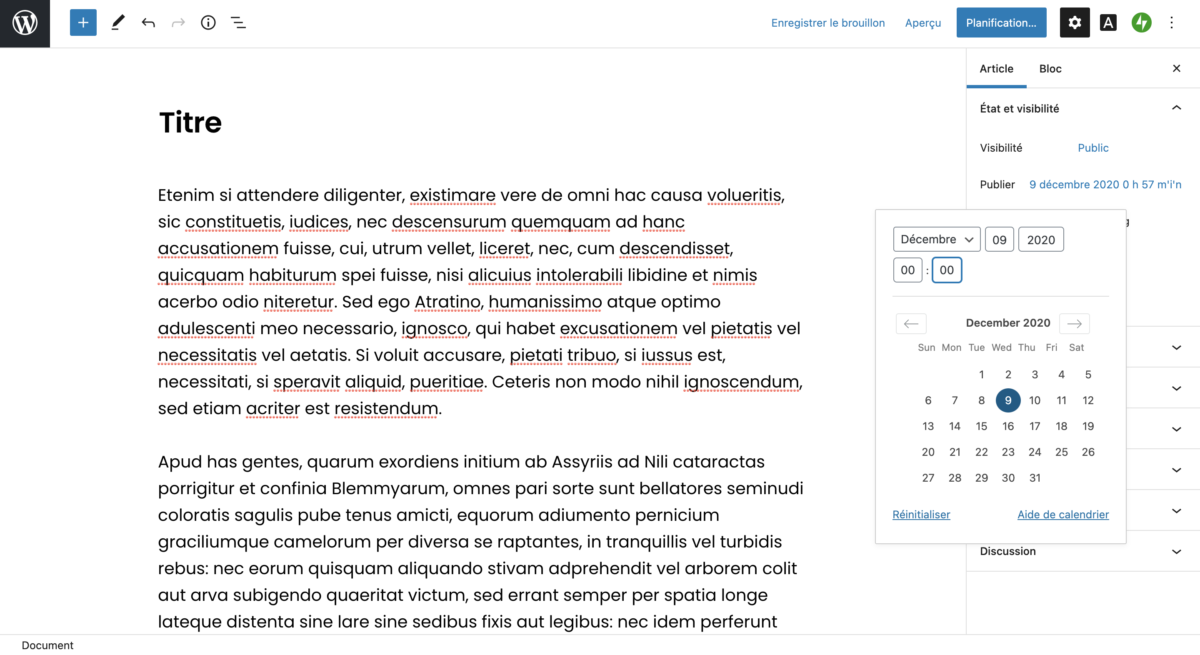
Once finished, do not click on the “Publish” button but click on the small settings button next to it. Select the “Article” tab. You can see “Immediately” after “Publish”, click on it and select the desired publication date and time.
The “Publish” button has become “Schedule…”. Click on it, then on “Schedule”.
You can also add a “Highlight” image to illustrate your article. In the article settings on the right side.
7. Change of theme
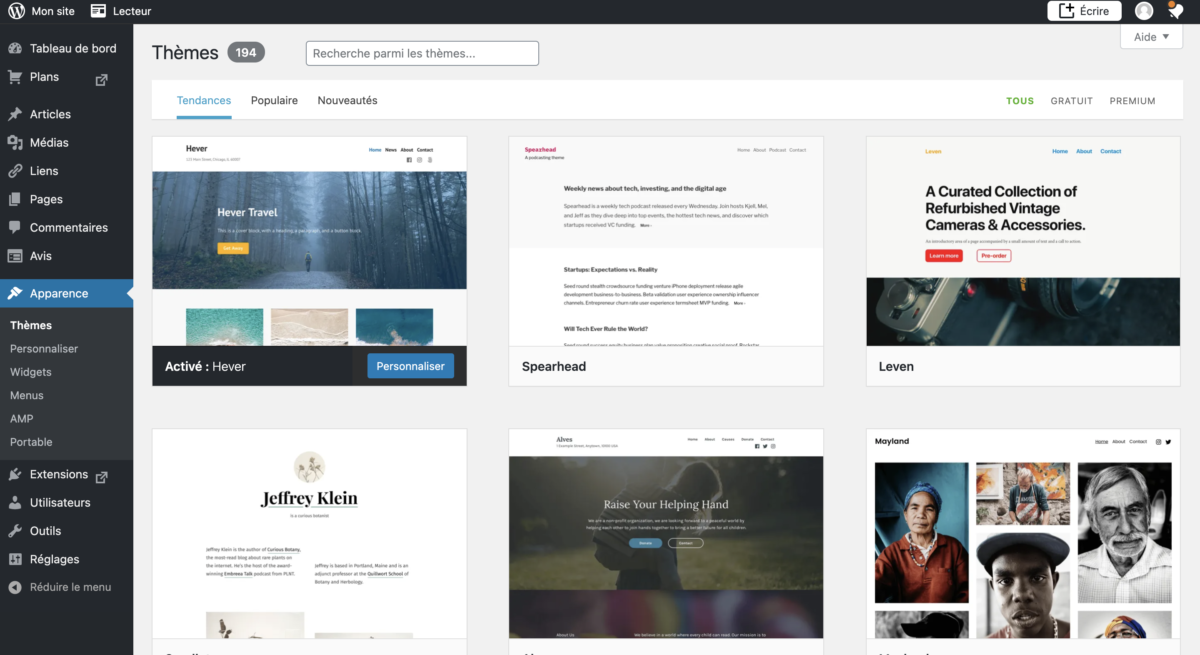
You can change the theme of your blog by clicking on “Appearance” in the menu of your administration, you will then have access to more than a hundred free themes.
8. Conclusion
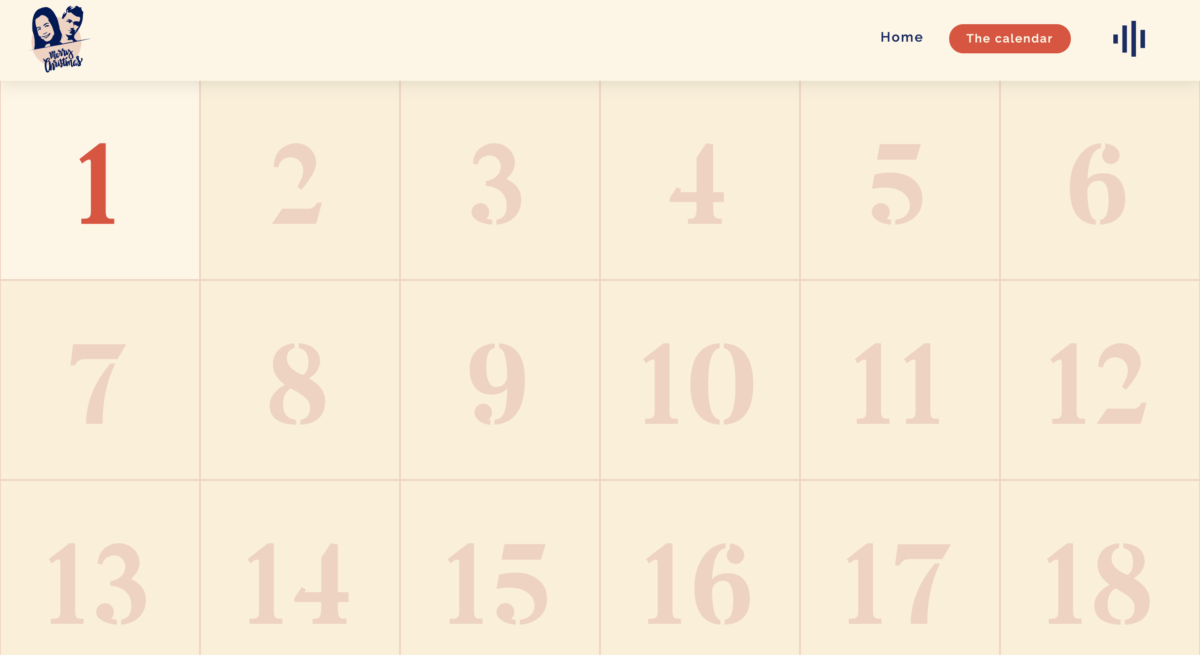
This is not the calendar I made since I developed it entirely, but I wanted to write a tutorial accessible to everyone.
You now have all the keys in hand to create an operational digital Advent calendar. Feel free to look at the options WordPress offers you in the settings to improve your project. I will explain how to create the basis of your calendar, it’s up to you to improve it 🙂.
See you soon, and Merry Christmas !!!